Country style kitchen cabinets bring a sense of warmth, history, and authenticity to any home. They’re rooted in practicality but never sacrifice charm, think open shelving, painted finishes, and solid wood construction that looks better as it ages. Whether someone’s renovating a 1920s farmhouse or softening the edges of a newer build, country cabinets offer a versatile foundation. This guide walks through the defining features, material choices, and DIY-friendly techniques that make this style enduring and approachable for hands-on homeowners.
Table of Contents
ToggleKey Takeaways
- Country style kitchen cabinets prioritize solid wood construction with painted or distressed finishes that embrace a lived-in, warm aesthetic rather than showroom perfection.
- Classic farmhouse and Shaker-inspired designs dominate country cabinet styles, featuring simple hardware, open shelving, and painted finishes in soft neutrals like whites, creams, and muted greens.
- DIY refinishing existing cabinets through TSP cleaning, sanding, and multi-coat painting is the most cost-effective way to achieve the country cabinet look.
- Choose durable, water-based or hybrid paints with bonding primers, allow 30 days for full cure, and create distressed finishes by sanding through paint at naturally worn areas like edges and corners.
- Pair country cabinets with complementary elements like butcher block or soapstone countertops, subway tile backsplashes, layered lighting, and warm-toned hardware in brass or black iron for cohesive design.
- Beadboard panels, islands with contrasting finishes, and open upper shelving add texture and character while keeping country kitchens functional and visually approachable.
What Defines Country Style Kitchen Cabinets?
Country style cabinets prioritize function and honest materials over ornate detail. The core elements include solid wood construction, often pine, oak, or maple, with visible wood grain or painted finishes in soft neutrals. Door styles lean toward raised or flat panels with simple hardware: cup pulls, bin pulls, or wrought-iron latches.
Open shelving and glass-front cabinet doors are common. They create display space for everyday dishes and keep the kitchen from feeling too closed off. Beadboard panels, either on cabinet backs or island sides, add texture without fuss.
Unlike contemporary flat-slab or high-gloss styles, country cabinets embrace a bit of wear. Distressed edges, hand-painted finishes, and variations in wood tone all fit the aesthetic. The goal is lived-in warmth, not showroom precision.
Cabinet height and depth often follow standard dimensions, base cabinets at 34.5 inches (before countertop), wall cabinets at 12 to 15 inches deep, but the details matter. Inset doors (where the door sits flush with the frame) are traditional, though overlay doors work fine and are easier to install for DIYers. If retrofitting an existing kitchen, check the face-frame width to confirm hinge and door compatibility.
Popular Country Cabinet Styles and Design Variations
Classic Farmhouse Cabinets
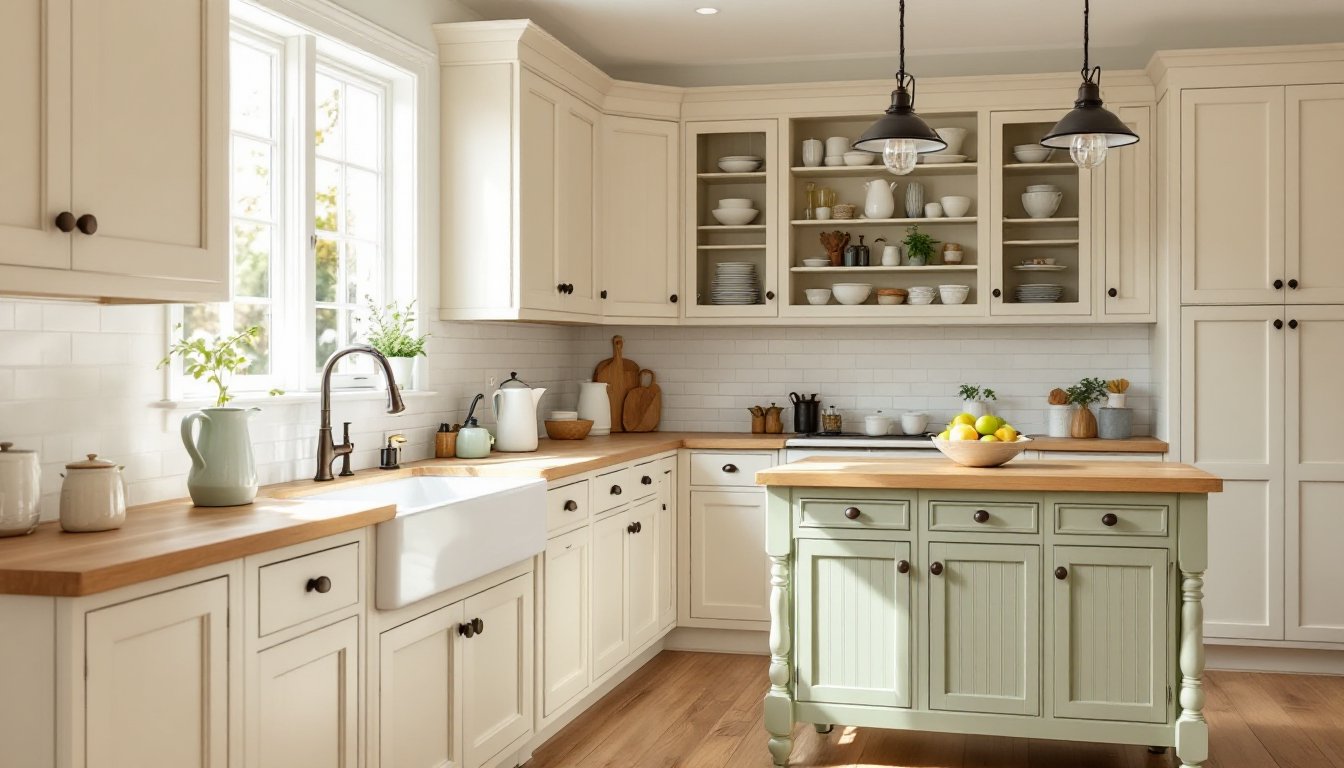
Farmhouse cabinets favor painted finishes, whites, creams, soft grays, and muted sage greens. The look often includes a mix of open upper shelving and closed lower cabinets. Islands might feature a contrasting finish, like natural wood countertops over painted base cabinets.
Large farmhouse sinks (apron-front style) pair naturally with this cabinet design, and the cabinet base beneath needs modification to accommodate the sink’s depth. Expect to cut or remove the front rail and add support blocking. Many rustic farmhouse kitchen designs pair reclaimed wood shelving with simple painted cabinetry for layered texture.
Hardware is understated, oil-rubbed bronze, black iron, or brushed nickel. Avoid anything too polished or contemporary. Farmhouse kitchens also lean into practical details like plate racks, pot rails, and appliance garages built into the cabinetry.
Cottage and Shaker-Inspired Designs
Shaker-style cabinets are a natural fit for country kitchens. The design is defined by a five-piece door with a flat center panel and square edges, clean, functional, and easy to build. Shaker doors work well in painted or stained finishes and suit both traditional and transitional spaces.
Cottage-style cabinets take Shaker simplicity and add softer touches: pastel paint colors, glass knobs, or chicken-wire inserts in upper cabinet doors. The overall vibe is lighter and more playful than a farmhouse kitchen but still rooted in classic forms.
Both styles benefit from furniture-style details, turned legs on islands, decorative corbels under shelves, or crown molding that’s modest in profile. Keep proportions balanced: oversized molding can overpower smaller kitchens.
Choosing the Right Materials and Finishes
Solid wood remains the best choice for authenticity and longevity. Pine is affordable and takes paint well, but it dents easily, fine for a distressed look, less ideal for high-traffic areas. Oak offers durability and prominent grain, making it a strong candidate for stained finishes. Maple is harder and smoother, better suited to painted applications where grain won’t show through.
Plywood box construction with solid wood face frames and doors is a practical middle ground. It’s more stable than solid wood in humid climates and reduces cost without sacrificing the look. Avoid particleboard cores in base cabinets: moisture from sinks and dishwashers will cause swelling over time.
Paint finishes should be durable. Use a bonding primer (like Zinsser B-I-N or KILZ Premium) followed by a semi-gloss or satin cabinet enamel. Alkyd (oil-based) paints cure harder than latex, but water-based hybrids like Benjamin Moore Advance offer easier cleanup and lower VOCs without sacrificing toughness. Allow full cure time, up to 30 days, before heavy use.
For stained cabinets, water-based stains dry faster and have less odor, but oil-based stains penetrate deeper and highlight grain better. Seal with a clear polyurethane topcoat (three coats minimum) or a hard wax oil for a more natural feel. Sand lightly between coats with 220-grit paper.
Hardware finish should match other kitchen metals, faucets, light fixtures, and appliance pulls. Mixing metals can work, but keep it intentional. For a country aesthetic, stick with warm tones (brass, bronze, black iron) over chrome or stainless.
How to Incorporate Country Cabinets Into Your Kitchen
Start with the layout. Country kitchens often center around a freestanding or built-in island that functions as both workspace and gathering spot. If space allows, use the island to introduce a contrasting finish, natural wood top, painted base, and add open shelving on one side for cookbooks or baskets.
Upper cabinets don’t need to run wall-to-wall. Leaving sections open for floating shelves, a plate rack, or a range hood surround breaks up the visual weight and adds character. If the ceiling height allows, stack cabinets to the ceiling or add a row of shallow cabinets above standard uppers for storage. Fill the gap with crown molding, but keep the profile simple.
Backsplashes should support, not compete with, the cabinets. Subway tile (3×6 inches), beadboard panels, or simple ceramic field tile in white or cream are safe choices. For more texture, consider handmade or irregular tile, but avoid busy patterns that clash with cabinet details.
Countertops in country kitchens often use butcher block, soapstone, or honed granite. Butcher block requires regular oiling and isn’t ideal next to sinks unless sealed properly. Soapstone develops a natural patina and handles heat well. For a budget-friendly option, laminate with a matte finish can mimic stone or wood without the maintenance.
Lighting plays a big role. Pendant lights over islands, under-cabinet LED strips, and vintage-style flush mounts keep the space functional. Avoid recessed cans as the only source, they flatten the warmth country cabinets are meant to create. Many ideas found on kitchen design resources focus on layering task and ambient lighting for better balance.
DIY Tips for Achieving the Country Cabinet Look
Refinishing existing cabinets is the most cost-effective route. Start by removing doors and hardware, then clean all surfaces with TSP (trisodium phosphate) to cut grease. Sand with 120-grit paper to rough up the finish, full removal isn’t always necessary if the old finish is sound. Repair any dings with wood filler and let it cure fully.
Prime with a bonding primer. Apply with a foam roller for flat surfaces and a quality brush (2.5-inch angled) for edges and details. Let primer dry 24 hours, then lightly sand with 220-grit before topcoat. Two thin coats of paint beat one heavy coat every time.
For a distressed finish, apply paint as usual, then use 120-grit sandpaper to wear through edges, corners, and raised details after the paint cures. Focus on areas that would naturally see wear, around handles, along bottom edges. Seal with a clear matte topcoat to protect the effect.
Adding beadboard panels to cabinet ends or island sides is a straightforward upgrade. Use 1/4-inch beadboard plywood or pre-made panels. Measure carefully, cut with a circular saw or table saw, and attach with construction adhesive and 18-gauge brad nails. Fill nail holes with spackling, sand, then paint.
Swapping hardware is the fastest visual change. Drill new holes if needed, use a template or jig to keep spacing consistent. For country style, look for cup pulls (3-inch or 3.75-inch centers) and knobs around 1.25 to 1.5 inches in diameter. Install with a drill/driver and don’t overtighten: you’ll strip the screw or crack the door.
If building cabinets from scratch, follow face-frame construction for a traditional look. Frames are typically made from 3/4-inch-thick hardwood ripped to 1.5 or 2 inches wide. Join with pocket screws (Kreg jig makes this easy) or mortise-and-tenon if you’ve got the tools and patience. Attach plywood box to the back of the frame with screws and glue.
For door construction, a rail-and-stile router bit set cuts the profiles needed for Shaker-style doors. Use 3/4-inch stock for rails and stiles, and a 1/4-inch plywood or MDF panel. Dry-fit before glue-up to check for square. Clamp carefully and let glue cure overnight.
Safety note: Wear a dust mask or respirator when sanding or cutting MDF. Use eye protection with any power tool, and hearing protection for routers and saws. Work in a ventilated area when using oil-based primers or stains.
Some regions and home styles, especially those featured in Southern home design, favor painted wood and natural finishes that highlight local materials and traditional craftsmanship. That approach aligns well with country cabinet aesthetics and offers plenty of room for personal touches without straying from the style’s roots.